As someone who plays Clash of Clans, you understand the importance of having a well-designed base for both the Home Village and Builder Base. When you reach Builder Hall 10, you’ll encounter numerous tough bases.
It becomes necessary to have a solid base design for your own village as well. I’ve collected a compilation of the best BH10 bases that can greatly assist you in pushing trophies.
These bases have been sourced from different places and are the creative work of committed players. All the credit for these designs goes to them.
Base Layout #1


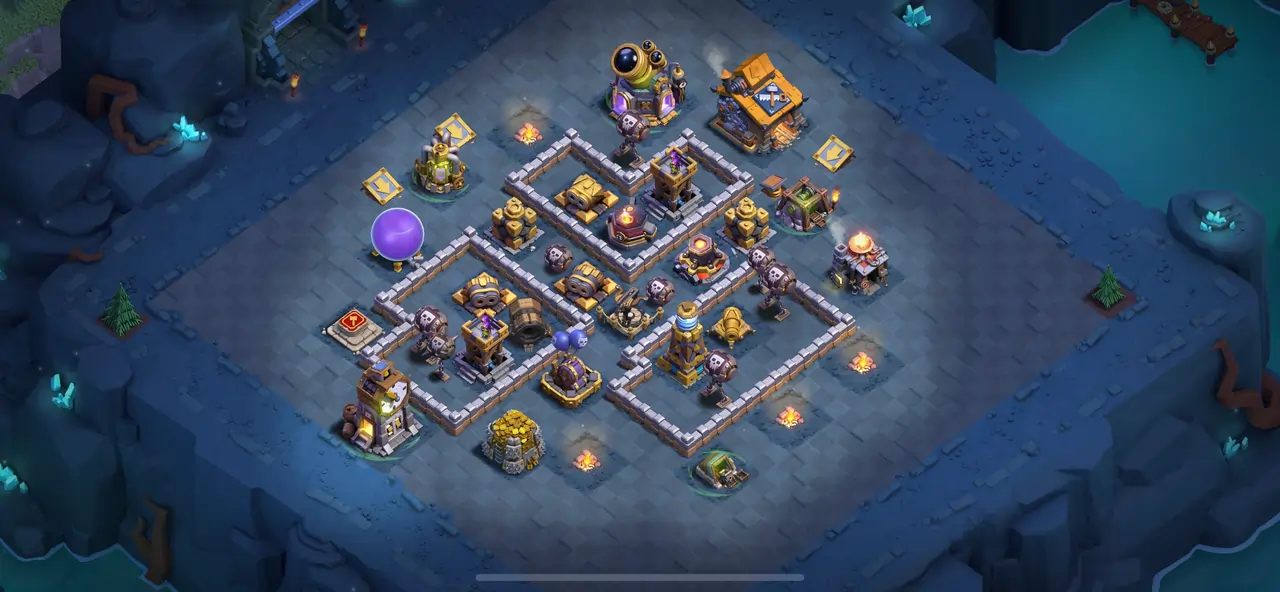
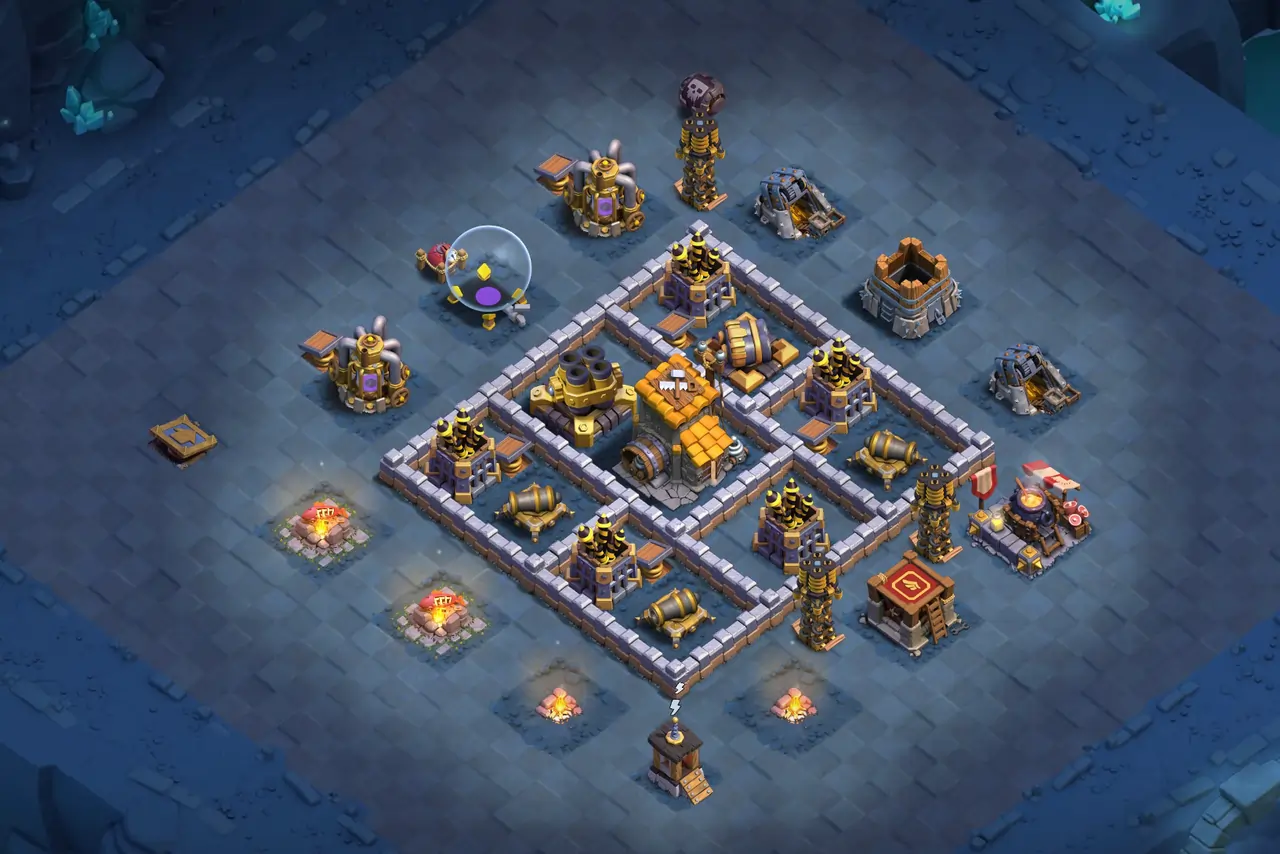
Let’s take a look at the first BH10 base layout. In this design, the main focus isn’t solely on safeguarding the Builder Hall, as it’s strategically positioned on the outskirts.
The primary objective of this base is to stop opponents from achieving a 3-star victory. To achieve this, important defenses are positioned within the heart of the base, while the Builder Hall takes an outer position.
Within the core, you’ll find defenses like the X-Bow, Lava Launcher, and Double Cannon, smartly shielded by three separate wall compartments surrounding them.
On the lower right side, there’s a compartment dedicated to safeguarding the Mega Tesla, whereas the other compartments house the Double Cannon, Archer Tower, and Roaster.
To stop ground troops from advancing to the core, Crushers are well-placed at the openings leading to the core.
Now, let’s talk about the second phase of this base layout. Right at the core, we find the OTTO’s Outpost. To ensure its protection, Firecrackers are intelligently placed within wall compartments encasing the OTTO’s Outpost, covering all angles.
While maintaining the base’s defenses, Hidden Teslas are positioned just outside the walls. Furthermore, key defenses like Archer Towers and Cannons find their home inside these very wall compartments.
Base Link: Copy Layout
Base Layout #2
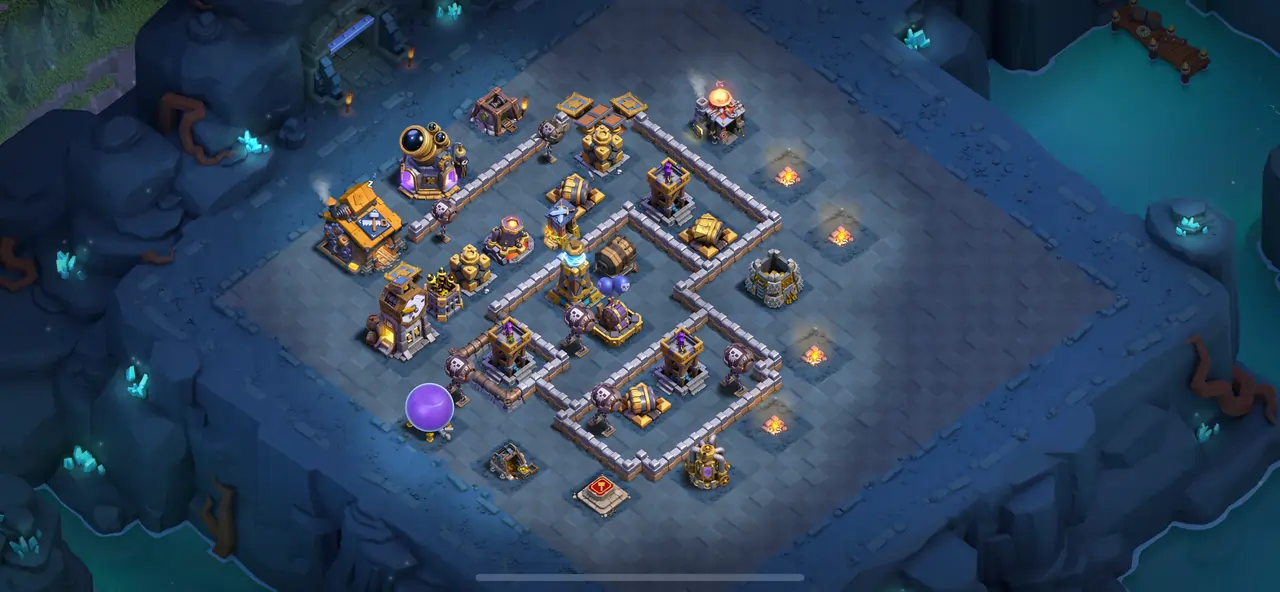
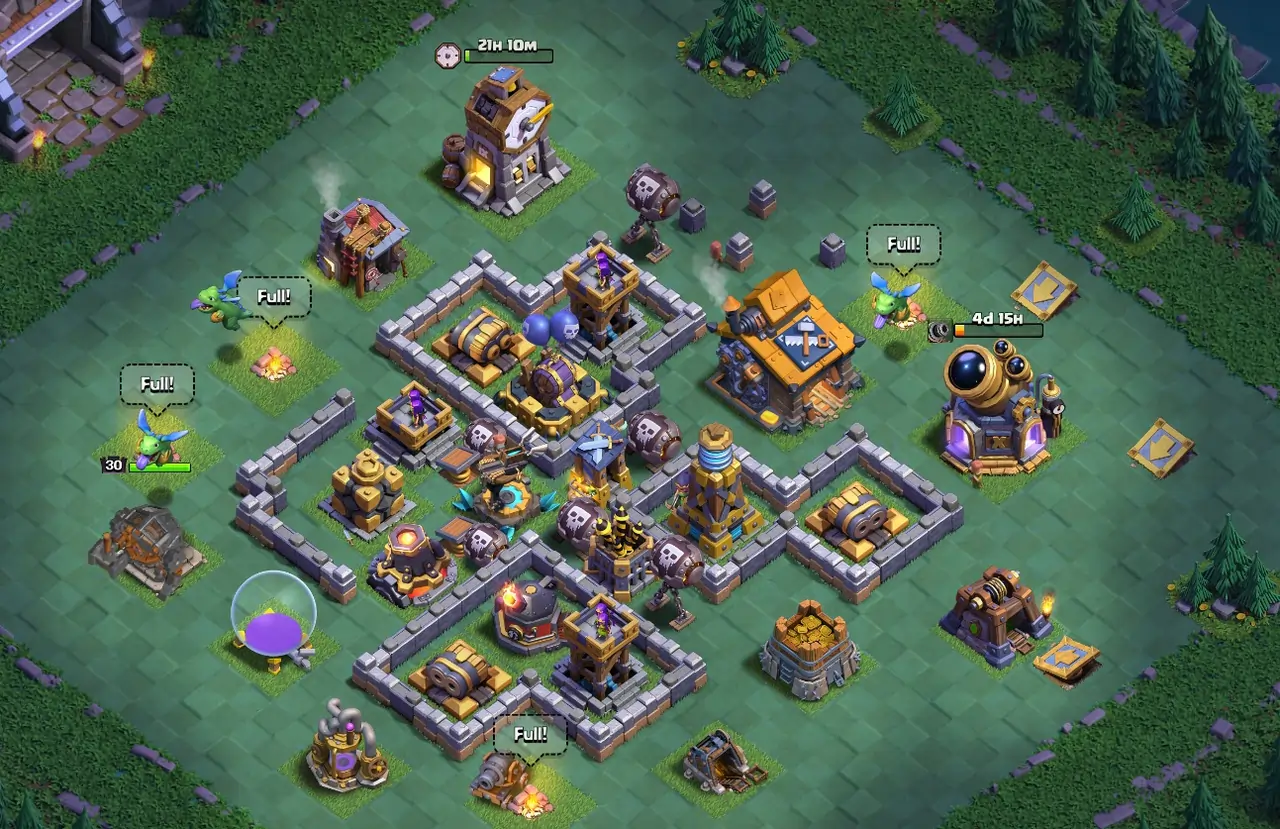
Moving on to the second BH10 base layout, we come across a well-crafted design that holds great potential. Let’s look at the initial phase of this layout. Here, you’ll notice that the Builder Hall has been deliberately positioned on the outer left corner of the base.
In the core of the base, we encounter multiple vital defenses. The Mega Tesla takes center stage, accompanied by Air Bombs, a Giant Cannon, and an air trap.
To solidify the core’s upper side, a tier of defenses is strategically implemented. This layer includes a Crusher, a Guard Post, a Lava Launcher, a Double Cannon, and an additional Crusher placed in close proximity to the Double Cannon.
Transitioning to the next phase of this base, we have a new layer of strategic planning. Here, the Roaster finds its place within the very same wall compartment as OTTO’s Outpost, sharing space with Firecrackers. Another compartment sits just above OTTO’s Outpost, housing a cluster of important defenses.
Base Link: Copy Layout
Base Layout #3
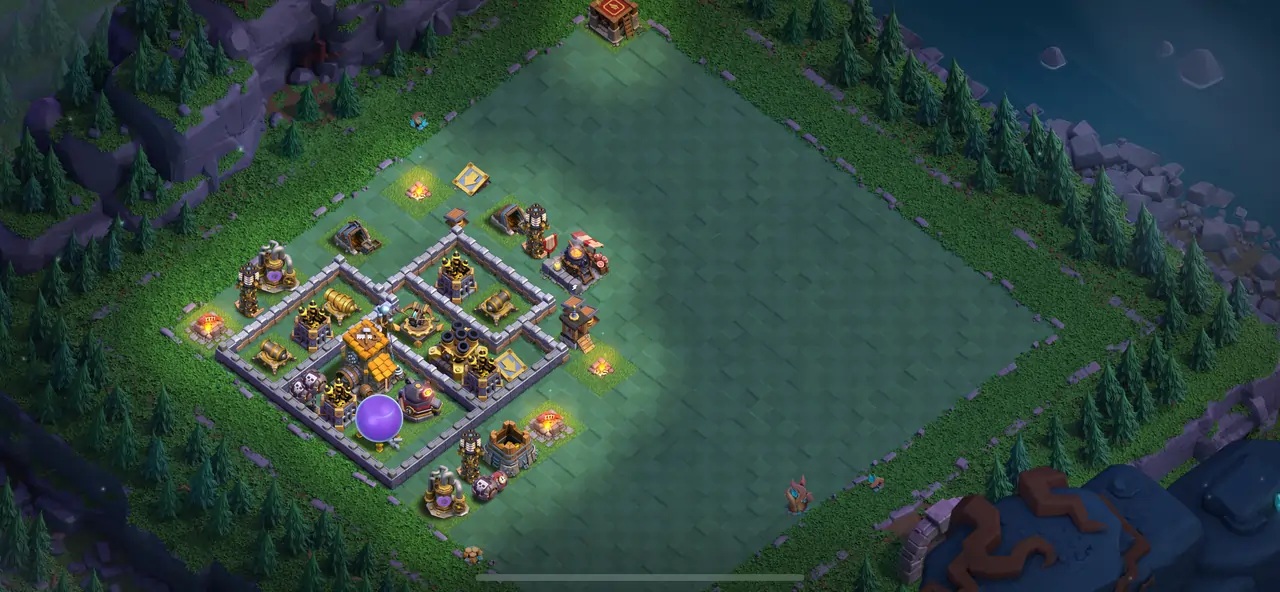
Now, let’s explore the layout of the third base, which is another well-thought-out design. This time around, the Builder Hall finds its place nestled in the lower corner of the base.
At the upper side of the Builder Hall, an opening catches the eye. This pathway leads to a compartment which houses the Crusher. This clever arrangement aims to divert Boxer Giants directly towards the Crushers, neutralizing their threat.
Additionally, a Giant Cannon and an Archer Tower are positioned in close proximity to the Crusher, strengthening the defensive line.
Continuing our tour towards the upper side, we encounter an isolated X-Bow within its own designated wall compartment. Key defenses like the Mega Tesla, second Crusher, and other important buildings are strategically arranged in the base’s initial phase.
Now, let’s talk about the second phase of the layout. The central area becomes home to OTTO’s Outpost, accompanied by a Multi Mortar. Encircling the OTTO’s Outpost, you’ll find an array of wall compartments, each holding Cannons and Firecrackers.
Increasing the defense further, two Hidden Teslas are positioned outside the walls, securing the lower side of the base. This combination of centralized strength and distributed defenses form a good base layout.
Base Link: Copy Layout
Base Layout #4

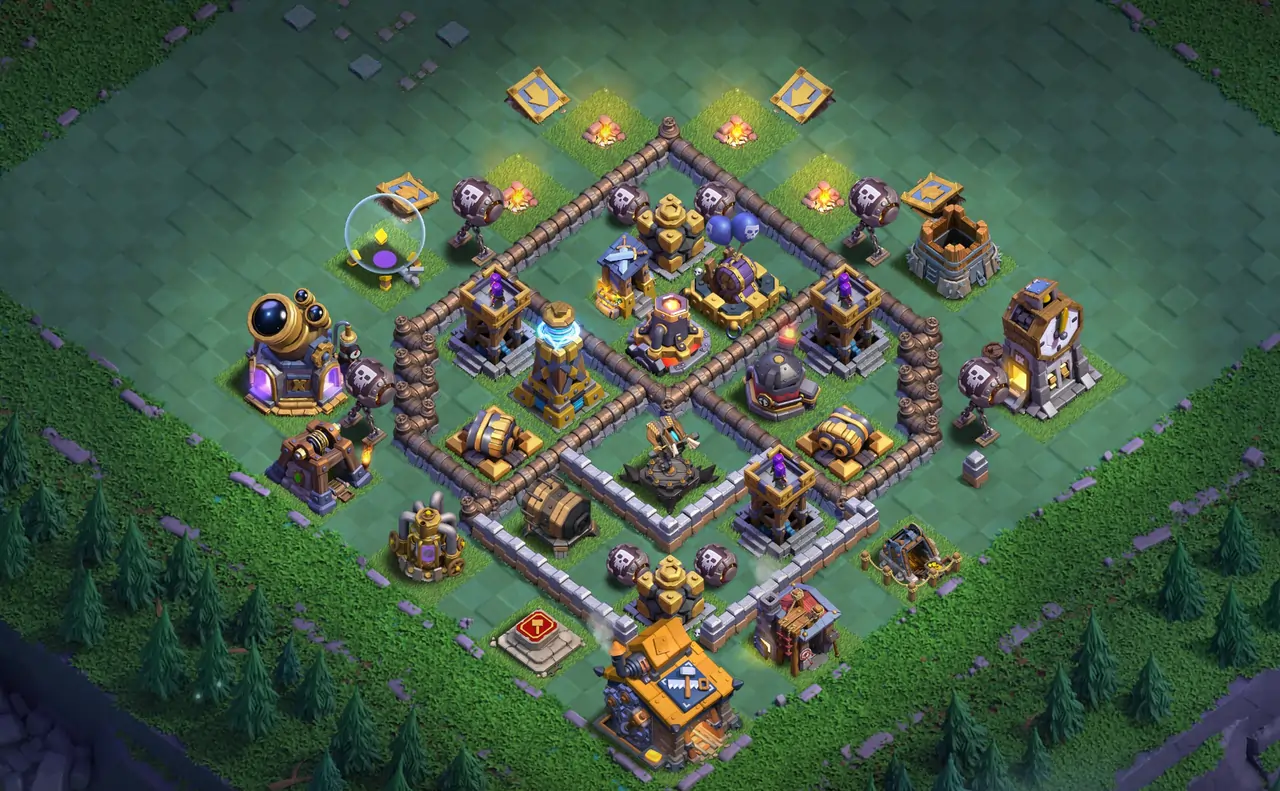
Let’s have a look at the fourth base layout tailored for BH10. Similar to the third layout, this one focuses more on the first phase of the base. The core of the first phase comprises an array of defenses: an X-Bow, a Lava Launcher, a Crusher, an Archer Tower, Firecrackers, a Guard Post, and strategically placed traps.
On the right side, you’ll notice a dedicated wall compartment housing the Mega Tesla and a Double Cannon. Moving to the bottom side, another wall compartment holds a Roaster, a Double Cannon, and an Archer Tower.
Positioned at the top, individual wall compartments are assigned for a Double Cannon, an Archer Tower, and Air Bombs.
As we transition to the second phase of this layout, a transformation takes place. A big wall compartment takes center stage, encasing OTTO’s Outpost.
Inside this compartment, you’ll find four Firecrackers, two Cannons, a Giant Cannon, a Multi Mortar, and a Hidden Tesla. The remaining traps and defenses are placed outside these protective walls.
To increase the defensive potential of the base, two layers of walls are thoughtfully set in place, guarding the left and top corners of the base. This layout balances concentrated defenses within compartments and extends protection through layers of walls.
Base Link: Copy Layout